
before you proceed for Spring boot example , please install KAFKA in you local machine and test Consumer and Producer once , refer this link to install Kafka on Windows machine https://crtr4u.com/index.php/2023/06/06/install-kafka-on-windows-10-step-by-step/
once you installed and tested then follow below steps :
note that Kafka and zookeeper must be Running refer above link to start both :
Step 1 : Create Spring boot project with dependencies as in below(pom.xml file) :
<?xml version="1.0" encoding="UTF-8"?>
<project xmlns="http://maven.apache.org/POM/4.0.0" xmlns:xsi="http://www.w3.org/2001/XMLSchema-instance"
	xsi:schemaLocation="http://maven.apache.org/POM/4.0.0 https://maven.apache.org/xsd/maven-4.0.0.xsd">
	<modelVersion>4.0.0</modelVersion>
	<parent>
		<groupId>org.springframework.boot</groupId>
		<artifactId>spring-boot-starter-parent</artifactId>
		<version>3.1.0</version>
		<relativePath/> <!-- lookup parent from repository -->
	</parent>
	<groupId>com.example</groupId>
	<artifactId>KafkaDemo-1</artifactId>
	<version>0.0.1-SNAPSHOT</version>
	<name>KafkaDemo-1</name>
	<description>Demo project for Spring Boot</description>
	<properties>
		<java.version>17</java.version>
	</properties>
	<dependencies>
		<dependency>
			<groupId>org.springframework.boot</groupId>
			<artifactId>spring-boot-starter-web</artifactId>
		</dependency>
<!-- https://mvnrepository.com/artifact/org.springframework.kafka/spring-kafka -->
<dependency>
    <groupId>org.springframework.kafka</groupId>
    <artifactId>spring-kafka</artifactId>
</dependency>

		<dependency>
			<groupId>org.springframework.boot</groupId>
			<artifactId>spring-boot-starter-test</artifactId>
			<scope>test</scope>
		</dependency>
	</dependencies>

	<build>
		<plugins>
			<plugin>
				<groupId>org.springframework.boot</groupId>
				<artifactId>spring-boot-maven-plugin</artifactId>
			</plugin>
		</plugins>
	</build>
</project>
Step 2 : in application.properties file write properties as below :
# Kafka configuration
spring.kafka.bootstrap-servers=localhost:9092
spring.kafka.consumer.group-id=test-consumer-group
spring.kafka.consumer.auto-offset-reset=earliest
you can get the values of bootstrap-servers and consumer group id from your kafka installation folder for example , C:\kafka\config from consumer.properties file.
In our properties file ,
what is spring.kafka.consumer.auto-offset-reset=earliest ?
This Kafka configuration is related to the Spring Kafka library, which is used for integrating Kafka messaging into Spring-based applications.
The configuration property spring.kafka.consumer.auto-offset-reset is used to specify the behavior of a Kafka consumer when it first starts reading from a topic and there is no committed offset for the consumer group.
In our example, earliest is the value assigned to spring.kafka.consumer.auto-offset-reset. This setting indicates that the consumer should start reading from the earliest available offset for the topic and partition it is assigned to. In other words, if the consumer group has not previously committed any offsets, or if the committed offsets are no longer available, the consumer will begin reading from the beginning of the topic.
There are other possible values for spring.kafka.consumer.auto-offset-reset:
latest: The consumer starts reading from the latest offset. If the consumer group has not committed any offsets, it will begin reading from the end of the topic, i.e., from the latest produced messages.none: The consumer throws an exception if no committed offsets are found for the consumer group. This is useful if you want to ensure that the consumer always starts reading from a specific offset.- A specific numeric offset: You can provide a specific numeric value to start reading from a particular offset in the topic.
It’s worth noting that the behavior of auto-offset-reset only applies when a consumer group is starting fresh, i.e., when there are no committed offsets for the group. Once a consumer group has committed an offset, subsequent restarts will resume reading from the last committed offset.
Step 3 : write kafka producer class as below :
package com.example.demo;
import org.springframework.beans.factory.annotation.Autowired;
import org.springframework.kafka.core.KafkaTemplate;
import org.springframework.stereotype.Service;

@Service
public class KafkaProducer {
    @Autowired
    private KafkaTemplate<String, String> kafkaTemplate;
    public void sendMessage(String message) {
        kafkaTemplate.send("test-topic", message);
    }
}
Step 4 : write kafka consumer class as below :
package com.example.demo;
import org.springframework.kafka.annotation.KafkaListener;
import org.springframework.stereotype.Service;

@Service
public class KafkaConsumer {
    @KafkaListener(topics = "test-topic", groupId = "test-consumer-group")
    public void receiveMessage(String message) {
        System.out.println("Received message: " + message);
    }
}
when we installed Kafka on windows 10 in our article , https://crtr4u.com/index.php/2023/06/06/install-kafka-on-windows-10-step-by-step/ we have already created one topic with name “test-topic” , we are mentioning same here in above class and group id we took from consumer.properties file(C:\kafka\config).
Step 5: write controller class as below :
package com.example.demo;
import org.springframework.beans.factory.annotation.Autowired;
import org.springframework.web.bind.annotation.PostMapping;
import org.springframework.web.bind.annotation.RequestBody;
import org.springframework.web.bind.annotation.RestController;

@RestController
public class MessageController {
    @Autowired
    private  KafkaProducer kafkaProducer;
    @PostMapping("/messages")
    public void sendMessage(@RequestBody String message) {
        kafkaProducer.sendMessage(message);
    }
}
finally before running our main class , please start your zookeeper and kafka , refer our old article for same Kafka Installation Article
to start zookeeper and kafka , we are executing below two commands from command prompt (C:\kafka) :
.\bin\windows\zookeeper-server-start.bat .\config\zookeeper.properties

.\bin\windows\kafka-server-start.bat .\config\server.properties
finally we can run our main class to start application :
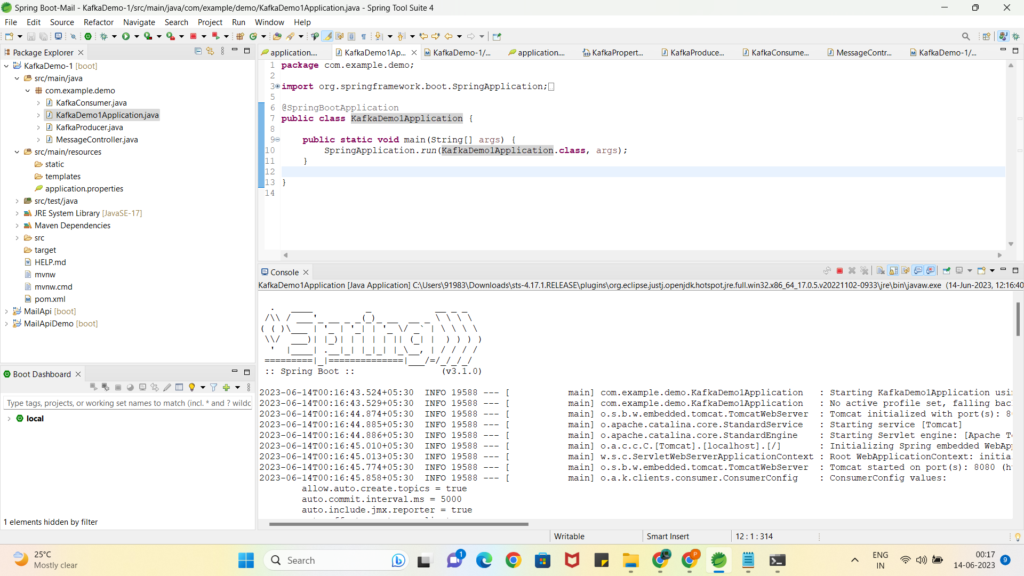
once application run without any error , open postman tool to send request :
as below send request to controller : (click on send button)
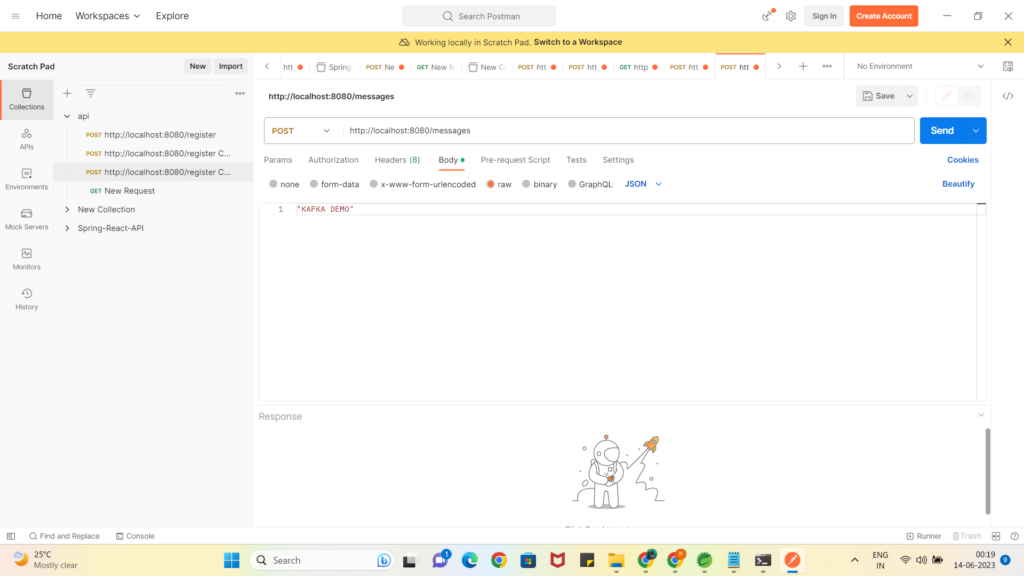
It will go to controller and then Producer will publish message to the topic and then consumer will consume message from topic and then it will print the message on console as below :
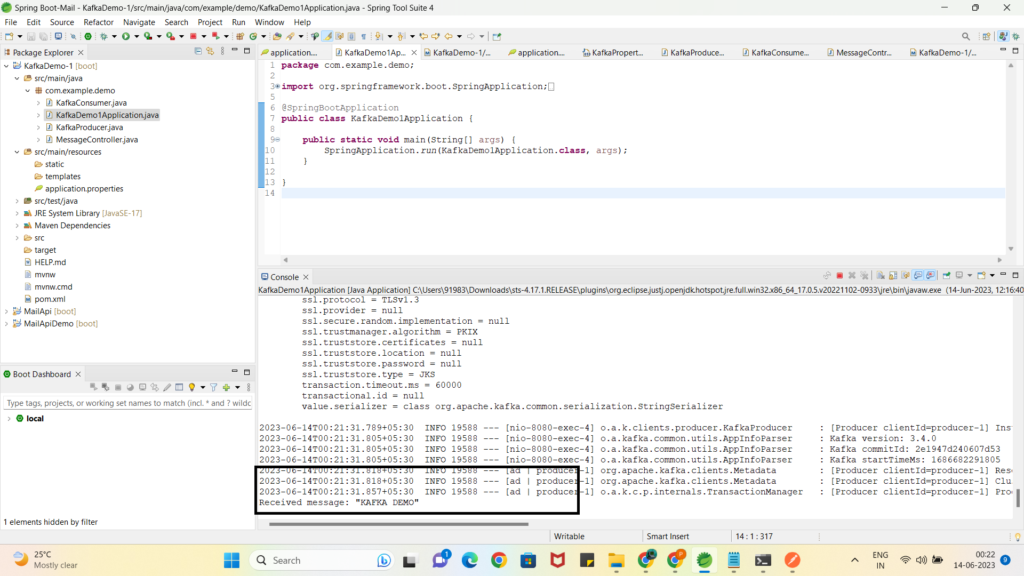
if you check on console you will see Received message printed by consumer.
Thanks For Reading ,
Happy Learning
Leave a Reply