
Step 1 : Create Spring Boot Project with Spring Web Dependency.
Main Class :
package com.example.demo;

import org.springframework.boot.SpringApplication;
import org.springframework.boot.autoconfigure.SpringBootApplication;

/**
 * author : Swapnil Vyawhare
 * website :  https://crtr4u.com
 */

@SpringBootApplication
public class BasicAuthApplication {

	public static void main(String[] args) {
		SpringApplication.run(BasicAuthApplication.class, args);
	}

}
Step 2 : Create a Student model class as below :
package com.example.demo;
/**
 * author : Swapnil Vyawhare
 * website :  https://crtr4u.com
 */
public class Student {

	private int id;
	private String name;
	public Student(int id, String name) {
		super();
		this.id = id;
		this.name = name;
	}
	public Student() {
		super();
	}
	public int getId() {
		return id;
	}
	public void setId(int id) {
		this.id = id;
	}
	public String getName() {
		return name;
	}
	public void setName(String name) {
		this.name = name;
	}
	@Override
	public String toString() {
		return "Student [id=" + id + ", name=" + name + "]";
	}
}
Step 3 : Create a sample Rest Controller class as below :
package com.example.demo;

import java.util.Arrays;
import java.util.List;

import org.springframework.web.bind.annotation.GetMapping;
import org.springframework.web.bind.annotation.PostMapping;
import org.springframework.web.bind.annotation.RequestBody;
import org.springframework.web.bind.annotation.RestController;
/**
 * author : Swapnil Vyawhare
 * website :  https://crtr4u.com
 */

@RestController
public class StudentController {
	@GetMapping("/students")
	public List<Student> getStudents() {

		return Arrays.asList(new Student(1, "Swapnil Vyawhare"), new Student(2, "Pooja Patil"));
	}
	@PostMapping("/save")
	public Student saveStudent(@RequestBody Student st) {

		return st;
	}

}
Step 4 : Create Interceptor as below :
package com.example.demo;

import java.nio.charset.StandardCharsets;
import java.util.Base64;
import org.springframework.util.StringUtils;
import org.springframework.web.servlet.HandlerInterceptor;
import org.springframework.web.servlet.ModelAndView;

import jakarta.servlet.http.HttpServletRequest;
import jakarta.servlet.http.HttpServletResponse;

/**
 * author : Swapnil Vyawhare
 * website :  https://crtr4u.com
 */
public class CollegeAuthInterceptor implements HandlerInterceptor {
	private static final String un = "sv";
	private static final String pwd = "pd";

	@Override
	public boolean preHandle(HttpServletRequest request, HttpServletResponse response, Object handler)
			throws Exception {
		String authorization = request.getHeader("Authorization");

		if (StringUtils.hasText(authorization) && authorization.startsWith("Basic ")) {

			String base64Cred = authorization.substring("Basic ".length());

			byte[] decodedCred = Base64.getDecoder().decode(base64Cred);

			String cred = new String(decodedCred, StandardCharsets.UTF_8);

			String[] parts = cred.split(":");

			if (un.equals(parts[0]) && pwd.equals(parts[1])) {

				return true;
			}

		}

		response.sendError(HttpServletResponse.SC_UNAUTHORIZED, "UnAuthorized");
		return false;
	}

	@Override
	public void postHandle(HttpServletRequest request, HttpServletResponse response, Object handler,
			ModelAndView modelAndView) throws Exception {
	}

	@Override
	public void afterCompletion(HttpServletRequest request, HttpServletResponse response, Object handler, Exception ex)
			throws Exception {
	}

}
Step 5 : Interceptor Configuration class as below :
package com.example.demo;

import org.springframework.context.annotation.Configuration;
import org.springframework.web.servlet.config.annotation.InterceptorRegistry;
import org.springframework.web.servlet.config.annotation.WebMvcConfigurer;
/**
 * author : Swapnil Vyawhare
 * website :  https://crtr4u.com
 */
@Configuration
public class InterceptorConfig implements WebMvcConfigurer {
	@Override
	public void addInterceptors(InterceptorRegistry registry) {
		registry.addInterceptor(new CollegeAuthInterceptor()).order(1);

	}
}
remember we added only Spring Web Dependency and we are not using any database ,main purpose is to understand Basic Authentication using Interceptor in Spring Boot.
Now once you wrote above code , please run application :
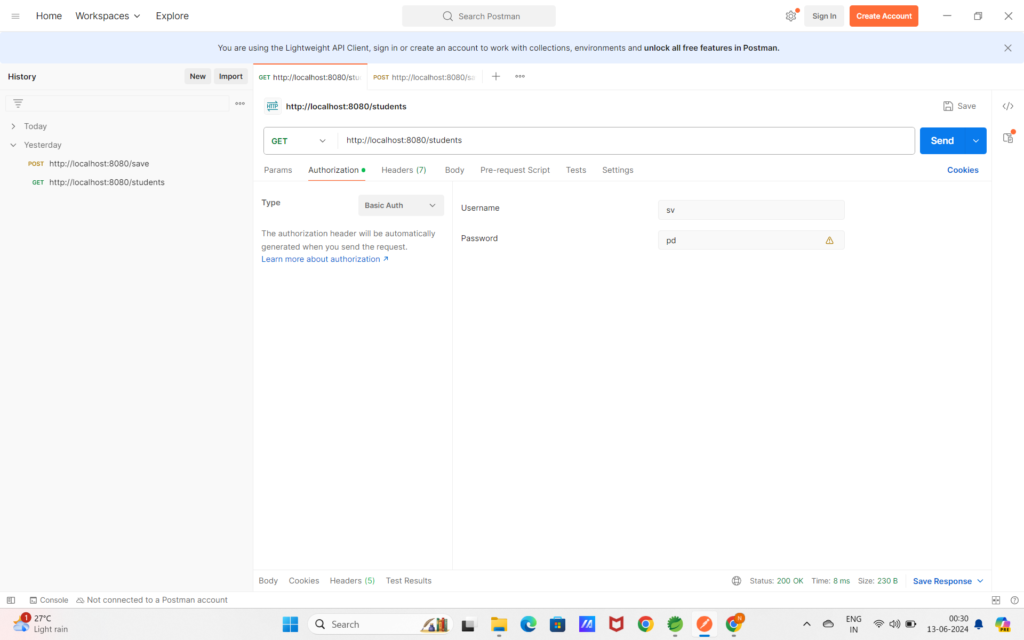
and for testing purpose configure username and password inside POSTMAN as below :
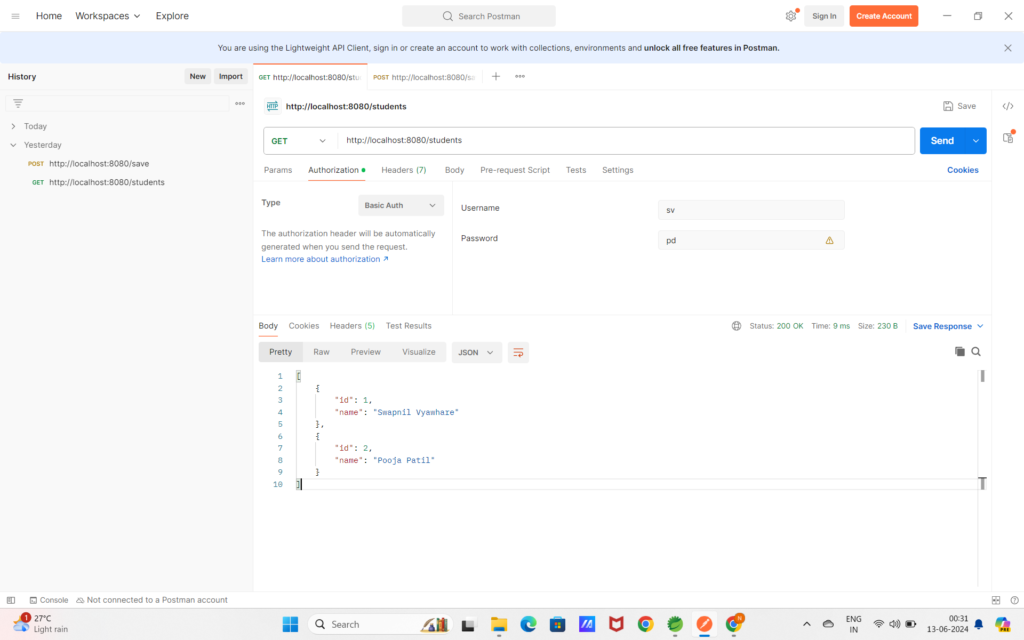
Now if you click on send button :
you will get response as below :
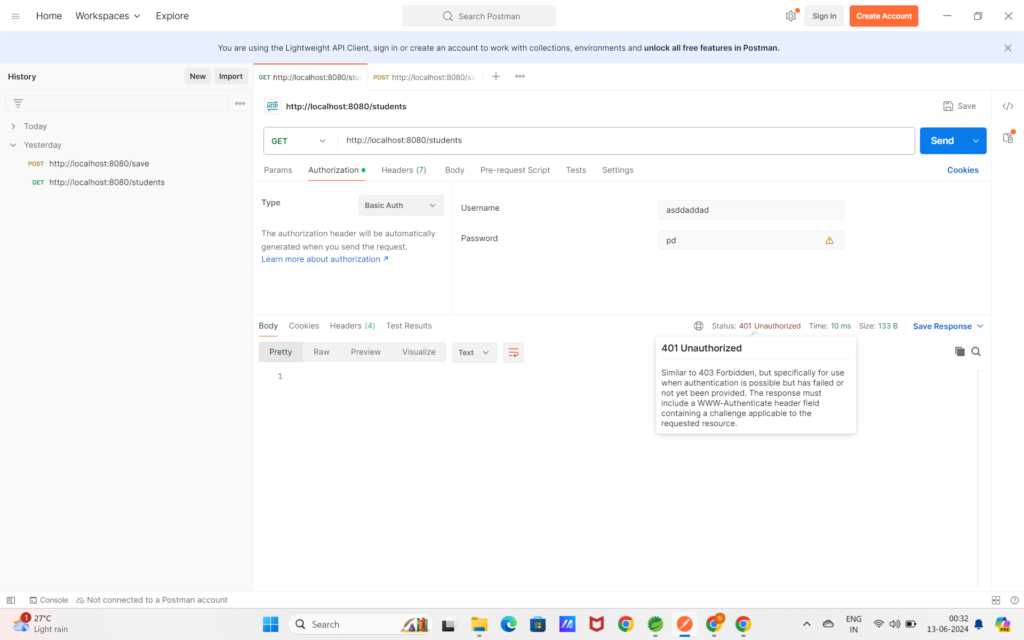
and if you send wrong password or username then you should get error as below :
Happy Learning ….
Leave a Reply