Interceptors in Spring Boot : Step By Step Example and In Depth Information
In Spring Boot, an interceptor is a component that allows you to intercept incoming HTTP requests and outgoing responses. It’s a part of the Spring MVC framework and provides a way to perform operations before and after a request is handled by a controller method.
Interceptors are commonly used for tasks such as logging, security checks, session management, and modifying request/response parameters.
To create an interceptor in Spring Boot, you typically implement the HandlerInterceptor interface and override its methods like preHandle, postHandle, and afterCompletion. These methods allow you to intercept the request before it’s handled by the controller, after the controller logic has been executed, and after the response has been sent back to the client, respectively.
Interceptors in Spring Boot act as mediators between the incoming HTTP request and the business logic associated with it. They provide a way to execute custom logic before and after handling a request, making them ideal for tasks like logging, authentication, authorization, and modifying request or response parameters.
In Spring Boot, we can implement interceptors by either extending the HandlerInterceptorAdapter class or implementing the HandlerInterceptor interface. Both approaches offer similar functionality, allowing you to define pre-processing and post-processing logic for HTTP requests.
Extending the HandlerInterceptorAdapter class provides a convenient way to implement interceptors by allowing you to override only the methods you need. On the other hand, implementing the HandlerInterceptor interface gives you more flexibility but requires you to implement all of its methods.
You can then register your interceptor in your Spring Boot application configuration to apply it to specific URLs or globally across all requests.
Interceptors in Spring Boot are versatile tools that can be utilized for a variety of purposes. Here are some common use cases for interceptors:
1.Logging: Intercepting requests and responses to log useful information such as request URLs, headers, parameters, and response statuses. This is valuable for monitoring and debugging applications.
2.Authentication and Authorization: Implementing security checks to ensure that only authenticated and authorized users can access certain endpoints. Interceptors can inspect incoming requests, validate credentials, and enforce access control rules.
3.Request and Response Modification: Modifying the content or headers of incoming requests or outgoing responses. This can include adding default parameters, transforming payloads, or setting specific headers based on business requirements.
4.Performance Monitoring: Capturing metrics related to request processing times, resource utilization, and other performance indicators. Interceptors can measure the duration of request processing and identify potential bottlenecks in the application.
5.Caching: Implementing caching mechanisms to store frequently accessed data and reduce response times. Interceptors can intercept requests, check if the requested data is available in the cache, and return cached responses when appropriate.
6.Internationalization and Localization: Intercepting requests to determine the user’s preferred language or locale and customizing the response content accordingly. This enables applications to provide localized content based on user preferences.
7.Error Handling and Exception Logging: Intercepting exceptions thrown during request processing and performing error handling tasks such as logging the error details, sending error notifications, or returning custom error responses to clients.
8.Session Management: Managing user sessions and maintaining session state across multiple requests. Interceptors can handle tasks such as session creation, validation, and cleanup, ensuring a smooth user experience.
9.Content Compression: Compressing response content to reduce bandwidth usage and improve network performance. Interceptors can intercept outgoing responses, compress the content, and set appropriate compression headers.
10.Request Validation: Validating incoming requests to ensure that they meet specific criteria or constraints. Interceptors can inspect request parameters, payloads, and headers, and enforce validation rules to prevent malicious or invalid input.
These are just a few examples of how interceptors can be used to enhance the functionality, security, and performance of Spring Boot applications. Depending on the requirements of your application, you can implement custom interceptors to address specific needs and integrate them seamlessly into your application’s request processing pipeline.
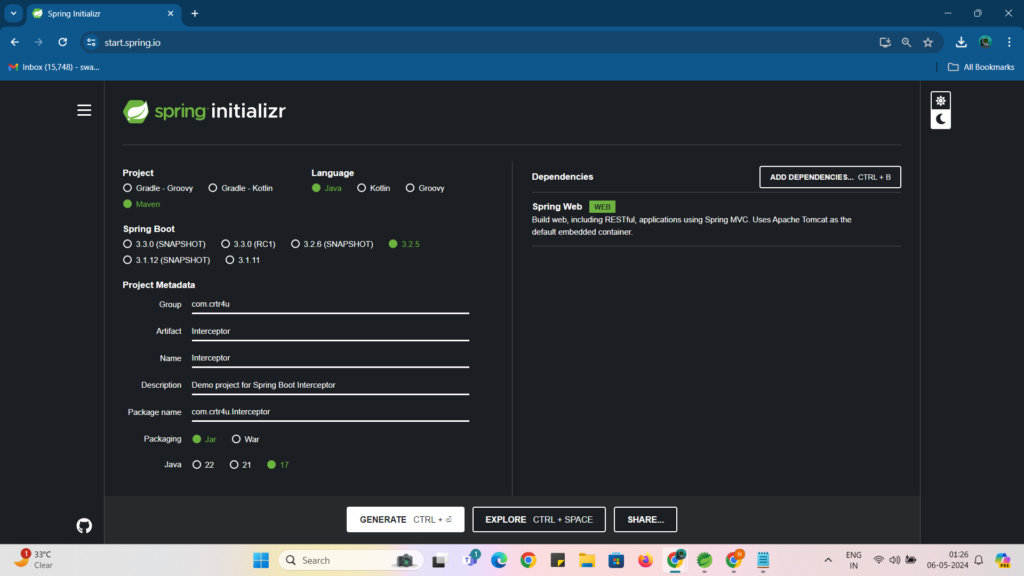
Step 1 : visit https://start.spring.io/ website and enter information as below you can select latest Spring Boot Version we are selecting 3.2.5 and Add Dependency of Spring Web and click on GENERATE button , it will download project zip file in your local.
Step 2 : Once zip file downloaded please unzip it and import in Spring Tool Suite IDE as a MAVEN project by pointing to pom.xml files location as below :

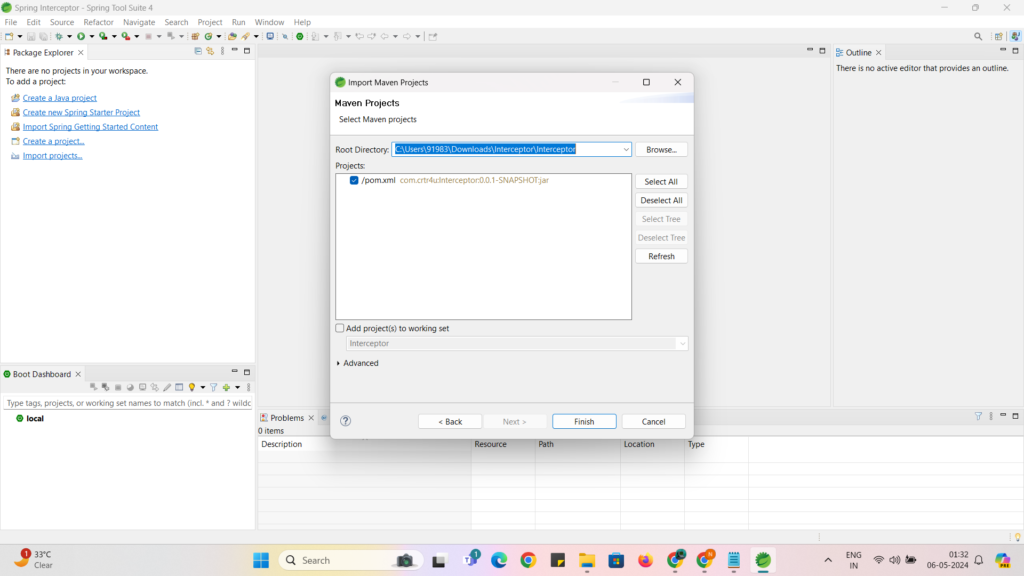
remember to import project –> Root Directory should be pointing to pom.xml files location in project as shown above.
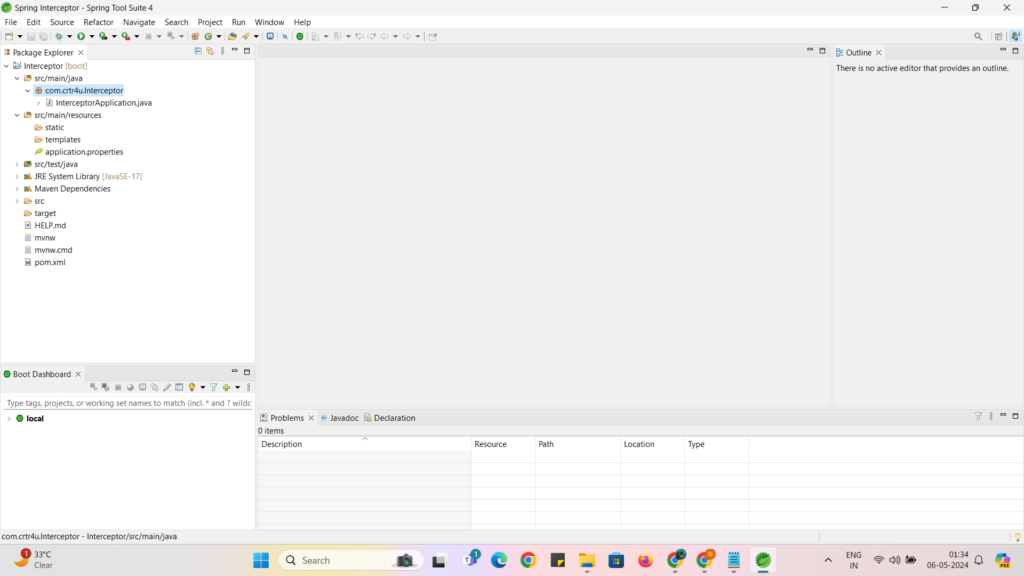
Once Project Imported It will look like this : you can open Window -> Show View -> Package Explorer
Step 3 : create POJO class with name Customer to store customer data as below :
Customer.java
package com.crtr4u.Interceptor.entities;

public class Customer {
	private int id;
	private String name;
	private String city;
	public Customer() {
		super();
	}
	public Customer(int id, String name, String city) {
		super();
		this.id = id;
		this.name = name;
		this.city = city;
	}
	public int getId() {
		return id;
	}
	public void setId(int id) {
		this.id = id;
	}
	public String getName() {
		return name;
	}
	public void setName(String name) {
		this.name = name;
	}
	public String getCity() {
		return city;
	}
	public void setCity(String city) {
		this.city = city;
	}
	@Override
	public String toString() {
		return "Customer [id=" + id + ", name=" + name + ", city=" + city + "]";
	}
}
Step 4 : Create a REST API RestController class to return list of customers as below :
package com.crtr4u.Interceptor.controller;

import java.util.ArrayList;
import java.util.Arrays;
import java.util.List;

import org.springframework.web.bind.annotation.GetMapping;
import org.springframework.web.bind.annotation.RequestMapping;
import org.springframework.web.bind.annotation.RestController;

import com.crtr4u.Interceptor.entities.Customer;

@RestController
@RequestMapping("/api")
public class CustomerController {

	@GetMapping("/view-all-customers")
	public List<Customer> customerList(){

		Customer c1=new Customer(1,"Swapnil Vyawhare","Pune");
		Customer c2=new Customer(2,"Winnie Smith","NewYork");
		Customer c3=new Customer(3,"Sheril Mariam","Amsterdam");
		Customer c4=new Customer(4,"Viki Sharma","Mumbai");
		List<Customer> customerList=new ArrayList<>();
		customerList.addAll(Arrays.asList(c1,c2,c3,c4));

		return customerList;

	}

}
Step 5 : Now before we implement Interceptor Firstly Test your application using Postman Tool ,To run the application right click on the main class and run as Java Application As Below :
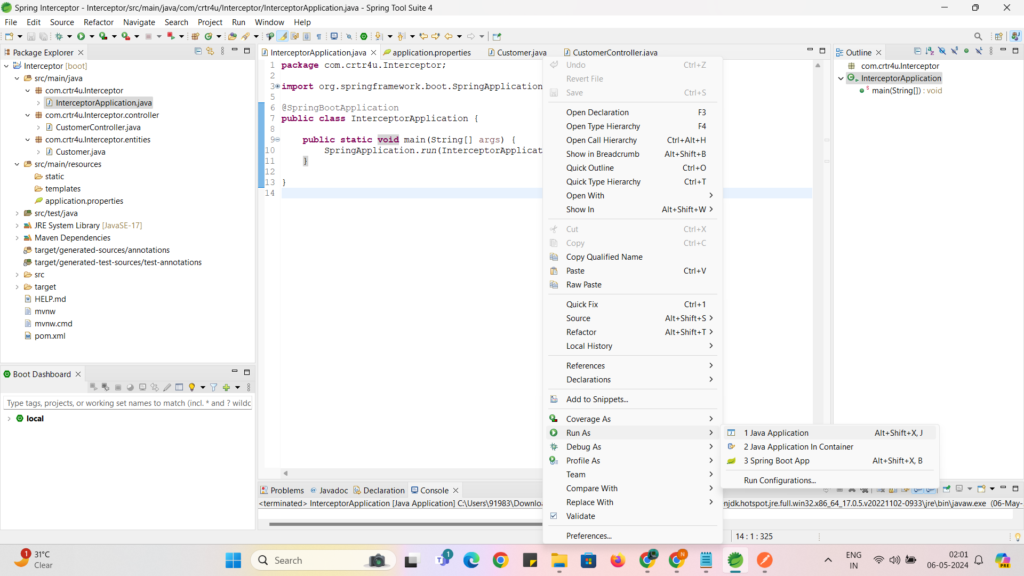
Step 6 : Go to Window -> Show View -> Console and verify application started on port 8080 as below or not 🙁 if you are not able to Run application , please comment below , I will help to run application personally using Google Meet online )

As show above there should be started message on console..
Step 7 : You can send GET Request from Postman tool to check response as below :
GET : localhost:8080/api/view-all-customers

Step 8 : Creating a Custom Interceptor:
Create a new class named LoggingInterceptor that implements the HandlerInterceptor interface.
Implement the three methods of HandlerInterceptor:
package com.crtr4u.Interceptor.custom_interceptor;

import org.springframework.stereotype.Component;
import org.springframework.web.servlet.HandlerInterceptor;
import org.springframework.web.servlet.ModelAndView;

import jakarta.servlet.http.HttpServletRequest;
import jakarta.servlet.http.HttpServletResponse;

@Component
public class LoggingInterceptor implements HandlerInterceptor {
	// Request is intercepted by this method before reaching the Controller
	@Override
	public boolean preHandle(HttpServletRequest request, HttpServletResponse response, Object handler)
			throws Exception {
		try {
			System.out.println("[preHandle] Processing request for: " + request.getRequestURI());
		} catch (Exception e) {
			e.printStackTrace();
			return false;
		}
		return true; // Allow request to proceed
	}

	// Response is intercepted by this method before reaching the client

	@Override
	public void postHandle(HttpServletRequest request, HttpServletResponse response, Object handler,
			ModelAndView modelAndView) throws Exception {
		System.out.println("[postHandle] Request processed for: " + request.getRequestURI());
	}

	// This method is called after request & response HTTP communication is done.

	@Override
	public void afterCompletion(HttpServletRequest request, HttpServletResponse response, Object handler, Exception ex)
			throws Exception {
		System.out.println("[afterCompletion] Request completed for: " + request.getRequestURI());
		if (ex != null) {
			System.err.println("[afterCompletion] Exception occurred: " + ex.getMessage());
		}
	}
}
Explanation:
The @Component annotation makes this class a Spring bean, allowing for auto-configuration.
The preHandle method is called before the controller method is invoked. Here, you can perform tasks like logging requests, security checks, or data validation. It returns true to allow the request to proceed, or false to stop it.
The postHandle method is called after the controller method has executed, but before the response is sent to the client. You can use this to modify the response or perform cleanup tasks.
The afterCompletion method is called after the request-response cycle is complete, regardless of whether an exception occurred. This is useful for logging or releasing resources.
Step 9 : Register the Interceptor (Optional):
While Spring Boot automatically discovers @Component-annotated interceptors, you can explicitly register it using a configuration class (especially for complex configurations or conditional registrations):
package com.crtr4u.Interceptor.custom_interceptor;

import org.springframework.context.annotation.Configuration;
import org.springframework.web.servlet.config.annotation.InterceptorRegistry;
import org.springframework.web.servlet.config.annotation.WebMvcConfigurer;

@Configuration
public class InterceptorConfig implements WebMvcConfigurer {

	@Override
    public void addInterceptors(InterceptorRegistry registry) {
        registry.addInterceptor(new LoggingInterceptor());
/*you can add for specific path as below */
/* registry.addInterceptor(new LoggingInterceptor()).addPathPatterns("/api/view-all-customers");*/
    }
}
Step 10 : Now Run application and send request from Postman tool :
GET : localhost:8080/api/view-all-customers
Now for this request you can see log on console as below :
[preHandle] Processing request for: /api/view-all-customers
[postHandle] Request processed for: /api/view-all-customers
[afterCompletion] Request completed for: /api/view-all-customers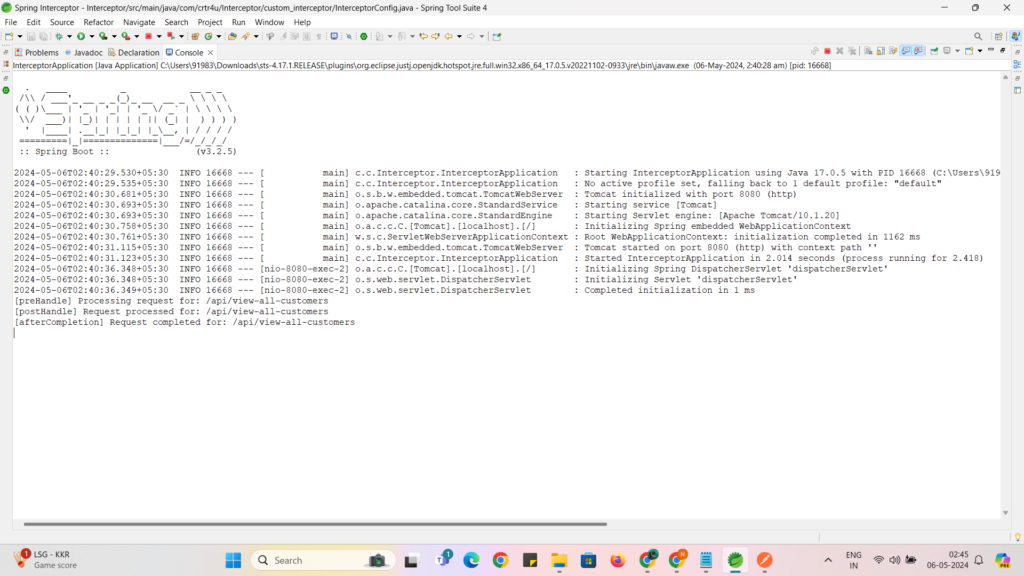
I Hope You Understood todays topic on How To Implement Interceptor In Spring Boot, If you have any questions please comment below , and I will try my best to help you to understand the concept.
Thank You,
Leave a Reply